


To stabilize shaky video in CapCut, select the clip and open Video > Basic > Stabilize on Desktop or Web. On Mobile, select the clip and use Edit > Stabilize. Compare the same difficult section at Recommended, Minimum cut and Most stable, then keep the lightest correction that makes the shake less distracting without ruining the frame. For the edit before and after stabilization, our CapCut tutorial for beginners connects trimming, framing, audio, motion and export.
Stabilization is a tradeoff, not a simple quality switch. Stronger correction can tighten the composition or bend local details around buildings, faces and foreground objects. What you want is the version that balances leftover shake, lost framing and distortion in the exported file.
Choose a CapCut Stabilization Level
Minimum cut
Try it when edge content matters and the source is already close to steady.
Recommended
Use it as the first comparison, then judge motion, crop and local warping together.
Most stable
Try it when shake still distracts and the composition has room for stronger correction.
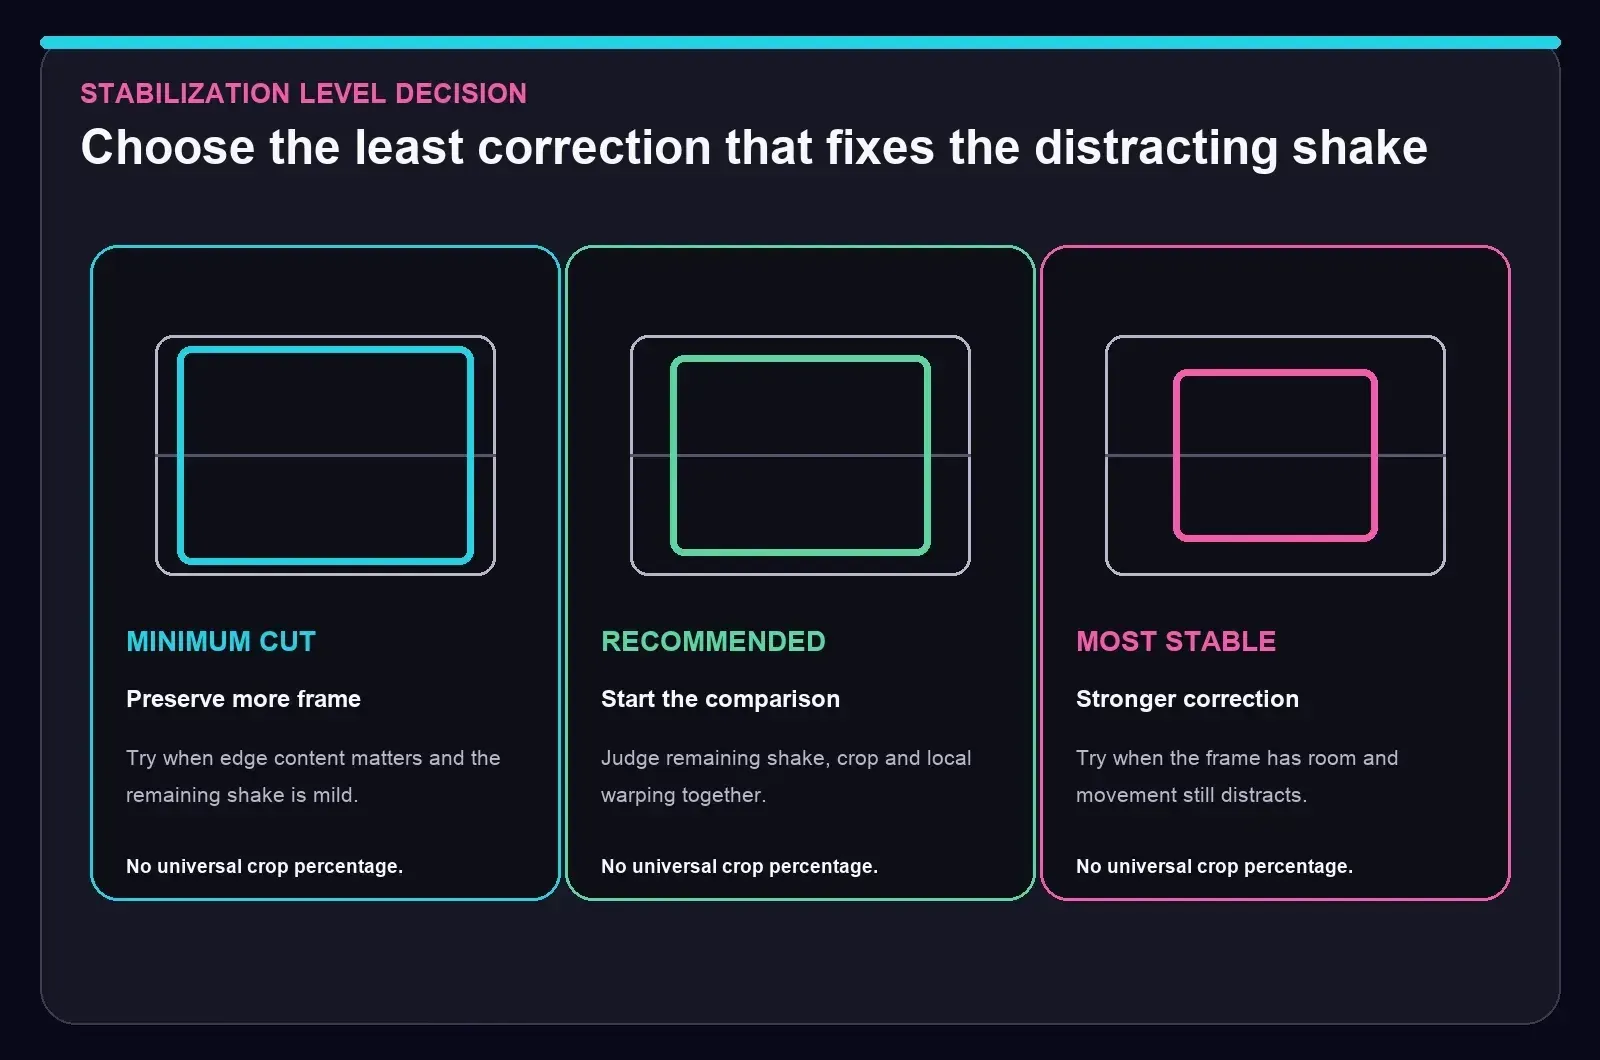
CapCut's official stabilizer guide names all three levels on Desktop, Mobile and Web. Those names point in a direction. They don't guarantee a crop percentage or a result. A wide landscape, a walking shot and a close-up with a face at the edge can react very differently.
I'd start with Recommended, because it sits in the middle and makes a useful reference. If important content disappears near an edge, move to Minimum cut. If the leftover shake looks worse than the tighter framing or distortion, try Most stable. Picking the strongest label doesn't mean you can skip watching the whole problem section.
Run a Representative Test Before the Full Clip
Start with the hardest passage: a footstep bounce, a fast pan, a foreground object crossing the frame or a sudden change in camera direction. Stabilize and export that passage before you process a long timeline. Pick the test section for its real difficulty instead of a fixed number of seconds.
Compare the same frames with Stabilize off, with Recommended and with the one alternative you're considering. Keep an eye on the horizon, vertical lines, faces, subtitles and anything near the boundary. A steadier center doesn't mean much if a face slips out of frame or a wall starts to pulse.
Set the final canvas before you make the last call. A crop that looks harmless in a wide source can get too tight once you convert to 9:16. The CapCut Reels workflow and TikTok workflow cover their vertical canvases separately.
Prepare the Source Before Stabilizing
Do the structural edit first. Cut unusable starts and stops, separate camera angles and keep any deliberate pan or reveal apart from accidental jitter. If the clip also needs a speed ramp, lock the useful source range before you judge stabilization. The CapCut velocity-edit guide handles the curve itself. A timing change later can shift the difficult frames and force another analysis.
- Use the cleanest source: repeated exports contain fewer reliable details and can make compression artifacts more visible after reframing.
- Keep an untouched copy: duplicate the project or preserve the source before a long repair pass.
- Check the intended canvas: leave enough room around faces, subtitles and products before choosing a stronger level.
- Remove creative camera shake for the test: judge the recorded movement before adding a shake effect or animated crop.
- Watch the source at normal speed: preview lag can resemble camera jitter even when the underlying frames are fine.
Stabilizing earlier in the edit makes the result easier to read, but it should still come after the rough cut has found the real shot. If a clip will be replaced, heavily cropped or cut down to a brief insert, it rarely needs a long full-source analysis.
How you shoot matters too. A wider lens, shorter focal length, steadier grip, controlled footsteps, optical stabilization, tripod or gimbal can keep more of the frame than a heavy repair later. Once the footage exists, aim for a watchable shot instead of a fake tripod look at any cost.
Why Stabilization Crops the Frame
A stabilizer estimates movement between frames, then shifts, rotates or scales the picture in the opposite direction. That correction can expose empty borders. Cropping or scaling hides those moving edges, which is why a smoother result may show less of the original frame.
Apple's current Final Cut Pro stabilization guidance describes motion analysis followed by compensating transforms, and it names cropping as one way to hide exposed borders. Adobe's Warp Stabilizer documentation spells out the crop-versus-smoothing tradeoff. These sources explain the underlying edit. They don't cover CapCut's interface.
CapCut gives you level names, with no universal crop number attached. Check the beginning, middle and end, then look at a face, title safe area, horizon, doorway or product near each edge. Minimum cut may keep more of the frame, but it can also leave movement that viewers still notice.
Know What Stabilization Can Repair
Camera shake
Small handheld jitter and repeated walking bounce are the main repair target.
Rolling shutter
Wobbly or skewed geometry is a separate sensor distortion and may need a dedicated tool.
Motion blur
Recorded smear stays in the frame even after its position becomes steadier.
Parallax
Near and far objects moving differently can make a warped correction more visible.
Stabilization works best when the unwanted movement comes from the camera. A runner, a passing car or leaves close to the lens can add competing motion. The background may get steadier while the foreground bends or pulses. A lighter level or a shorter segment often looks more natural than the strongest correction forced across the whole shot.
Captured motion blur, missed focus, exposure flicker, digital zoom jumps and compression damage are separate problems. Moving frames around can't rebuild clean detail the camera never recorded. Apple's iMovie guidance also treats rolling-shutter wobble as a separate correction from ordinary stabilization.
How to Stabilize Video on CapCut Desktop
CapCut's current official Desktop material shows the clip selected on the timeline with Stabilize under Video > Basic. The same material also shows the three current levels and a progress state while the analysis runs.
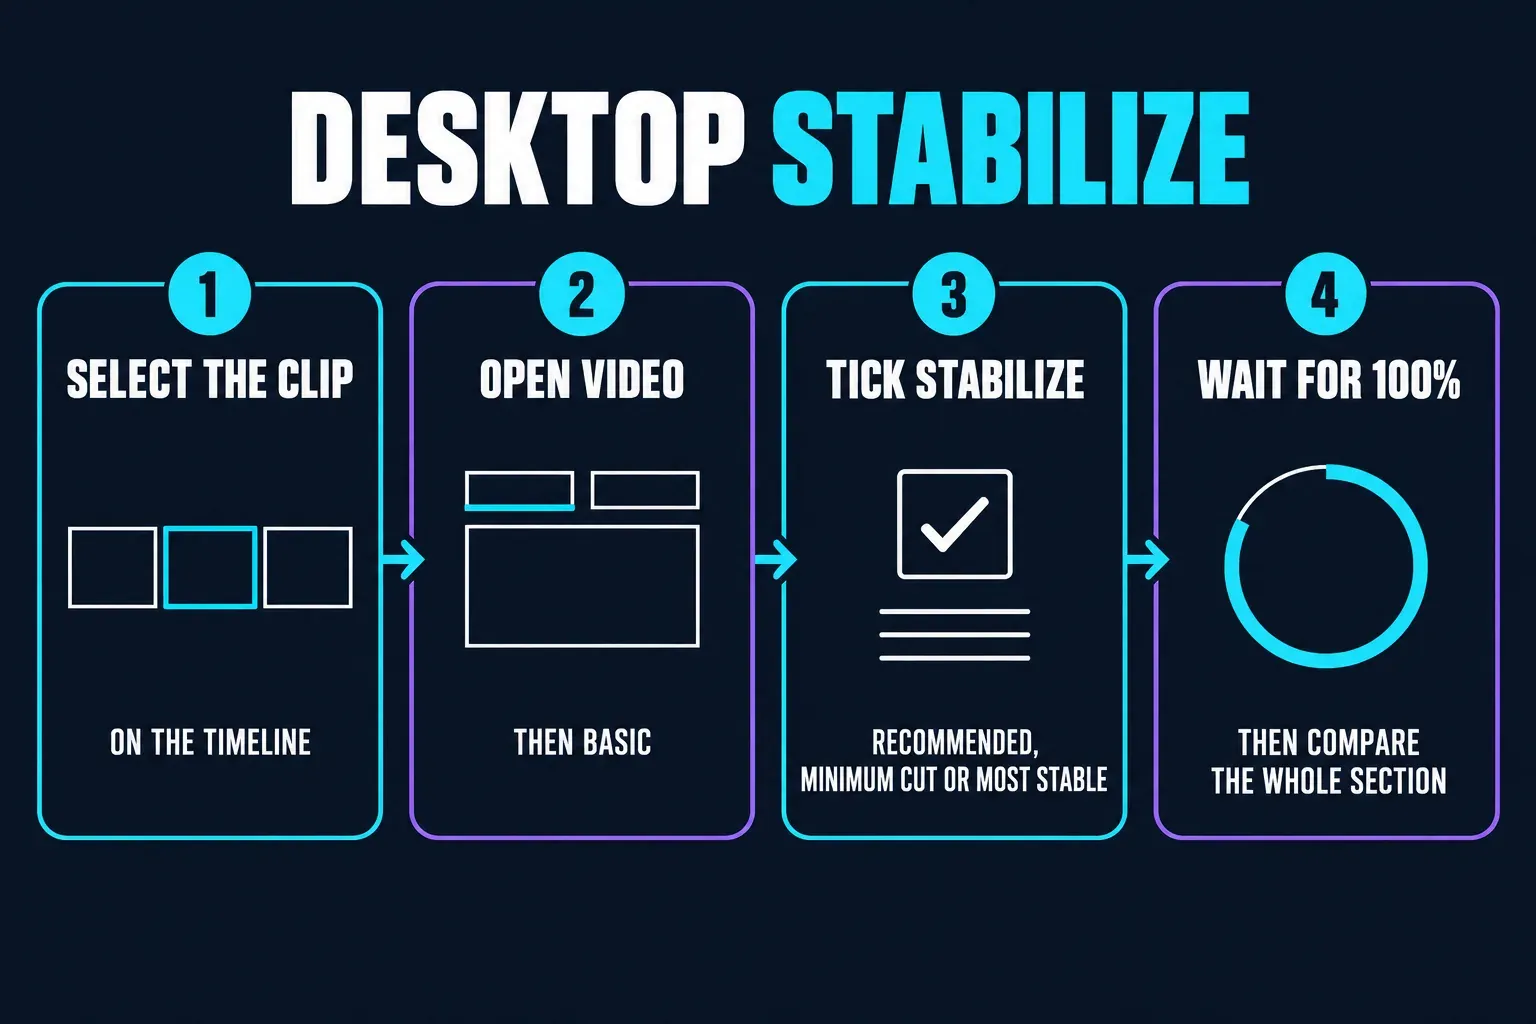
- Import the source and drag it to the timeline.
- Split out the section where the unwanted shake begins and ends.
- Select that media clip so the right inspector shows its video controls.
- Open Video > Basic, find Stabilize and enable it.
- Choose Recommended for the first comparison and wait for analysis to finish.
- Play the whole segment. Check edges, horizon, faces, straight lines and foreground objects.
- Compare Minimum cut or Most stable only when the first pass leaves a clear problem.
- Export a representative sample at the intended resolution and frame rate.
If the control seems to be missing, make sure you've selected the media clip and not the canvas, audio, text or effect layer. Update and restart the app, then test a short clip before you reinstall or change the project. The CapCut for PC guide and CapCut for Mac guide cover installation separately.
How to Stabilize Video on CapCut Mobile and Web
On Mobile, current material puts Stabilize in the selected clip's editing toolbar. On Web, current material shows the selected timeline clip with Stabilize under Basic. Both current examples offer Recommended, Minimum cut and Most stable.
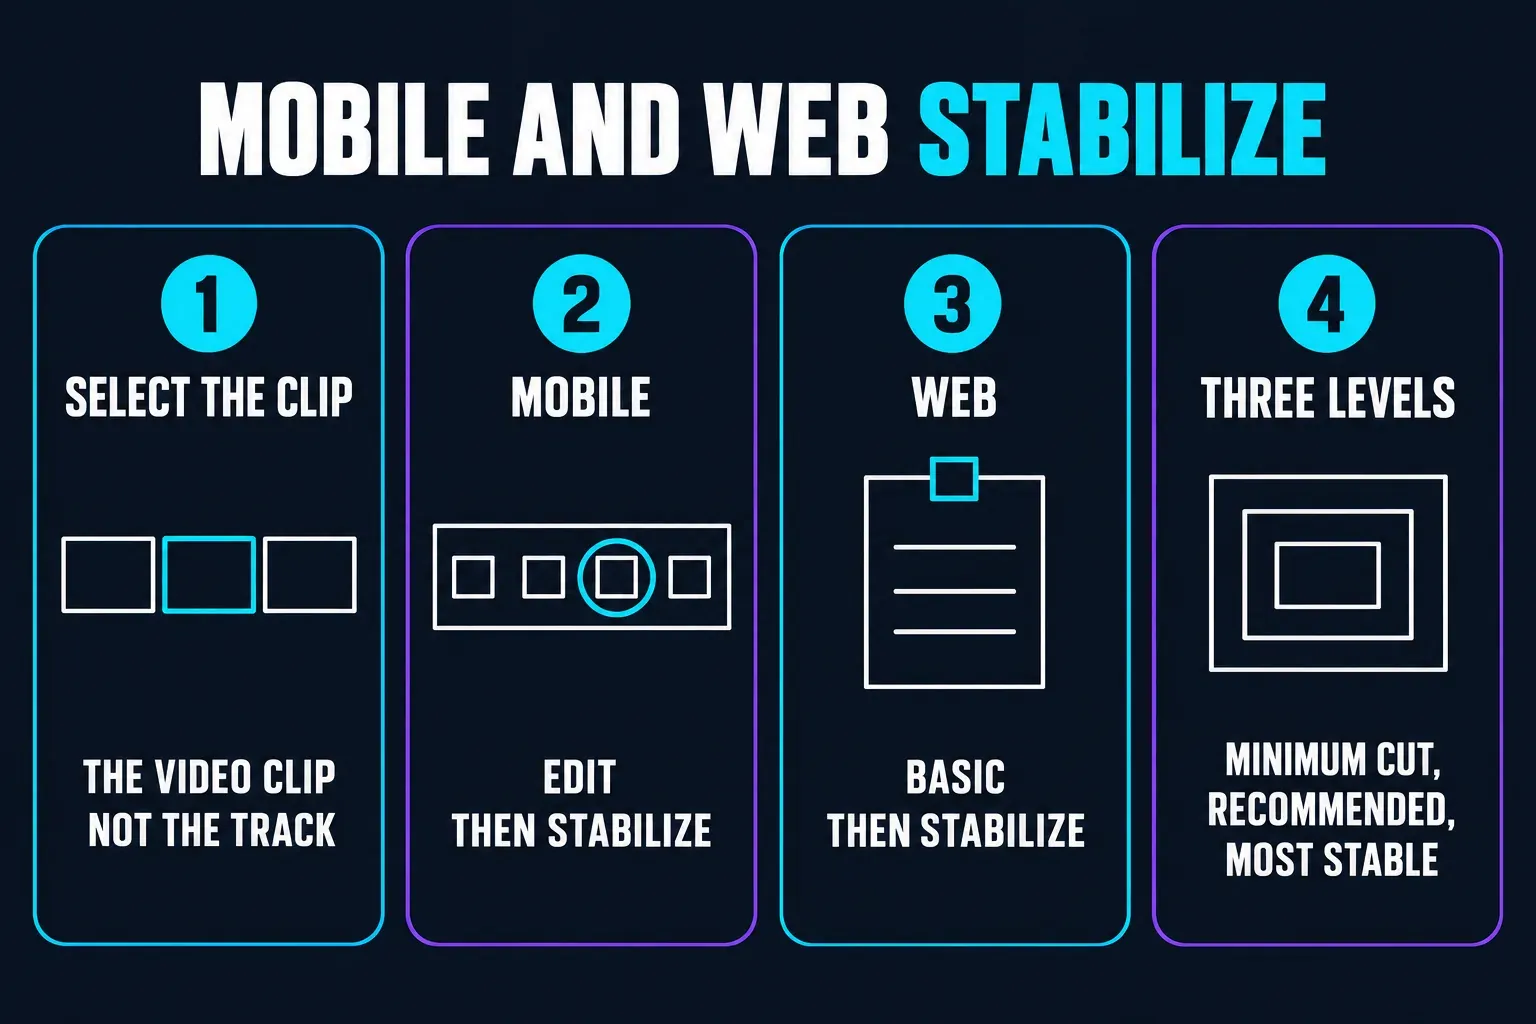
Mobile
- Tap New project, choose the source and add it to the timeline.
- Tap the video clip so its editing controls appear.
- Open Edit > Stabilize. Swipe the clip toolbar if the control sits off-screen.
- Run Recommended, then check the shakiest moment and every important edge.
- Try Minimum cut for a frame that feels too tight, or Most stable when movement still distracts and the shot has room.
- Export a sample and view it in the device gallery.
Web
- Upload the source and add it to the timeline.
- Select the timeline clip and open the right-side Basic controls.
- Enable Stabilize, choose a level and wait for processing.
- Compare the full problem passage, then download a representative sample.
CapCut's Web stabilization guide confirms the Basic route. On Web, the job also depends on upload, browser resources and server conditions, so keep a local copy of the source and don't let a cloud project become the only copy of important footage.
Stabilize Only the Shaky Part
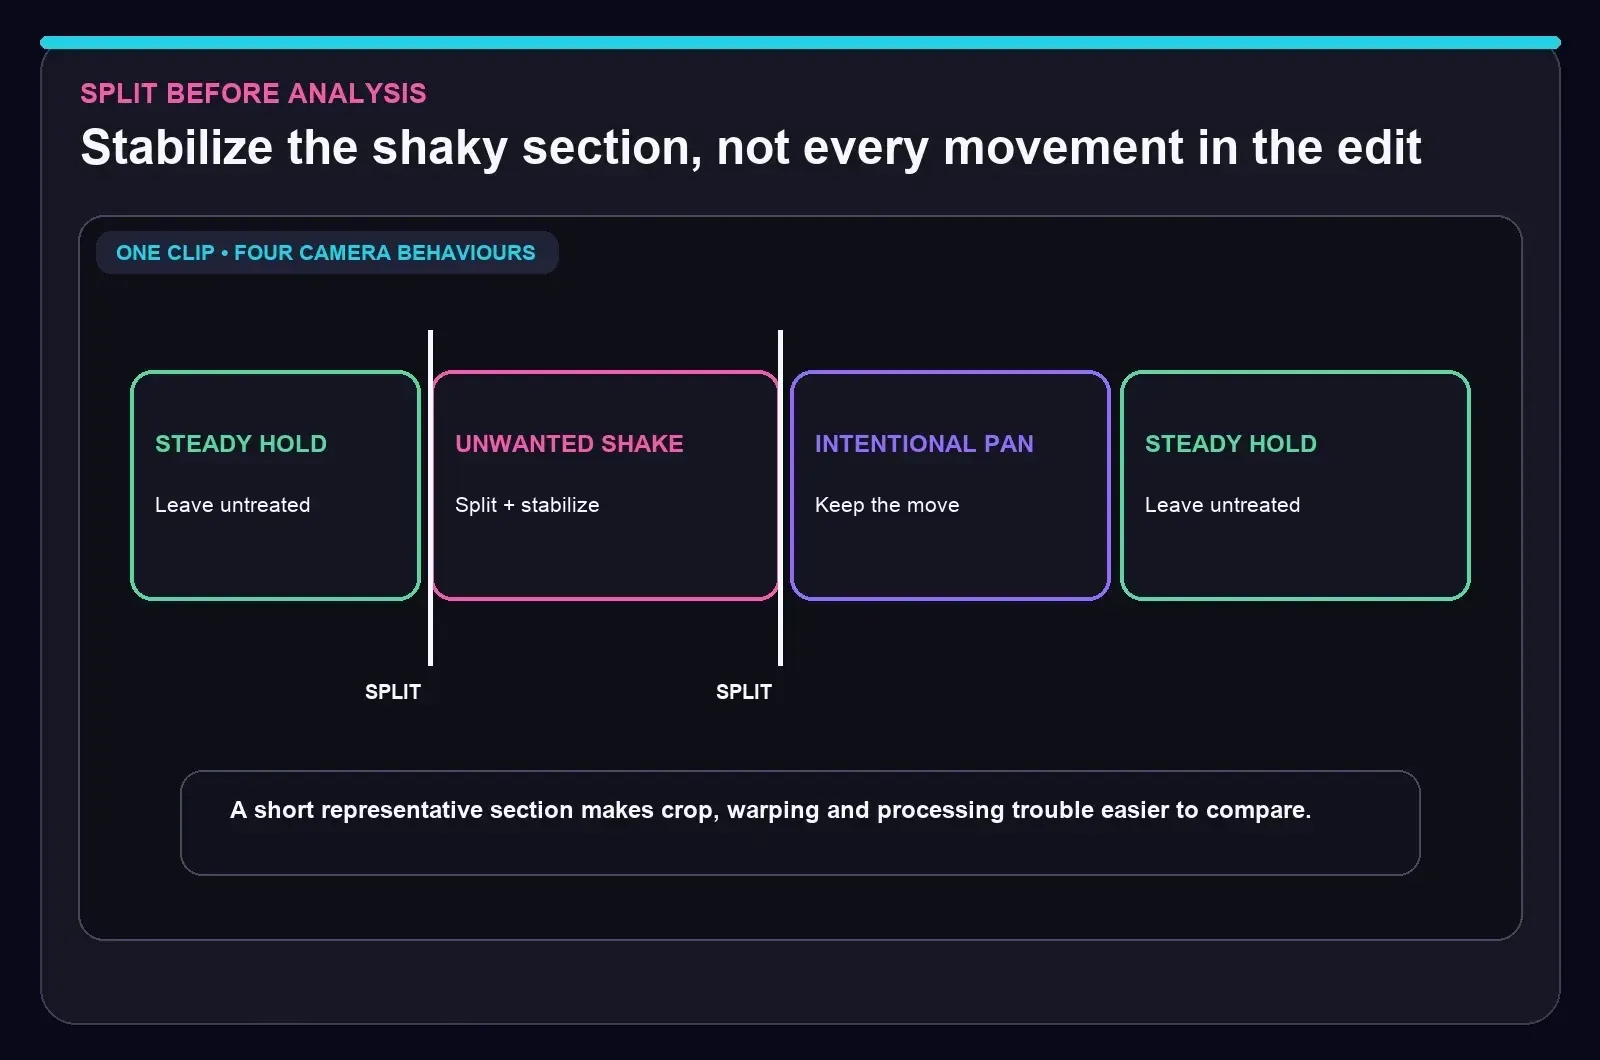
One clip may contain a steady hold, a walking section, a deliberate pan and another steady hold. Use one setting across all four and the stabilizer has to solve conflicting movement. Split around the unwanted shake and correct only that part.
- Place the playhead immediately before the distracting movement and split.
- Split again where that movement ends.
- Select the isolated middle segment and run Recommended.
- Check the split points for a sudden scale or framing jump.
- Try Minimum cut or move the cut to a natural visual change if the jump remains obvious.
Splitting first shortens the analysis and protects deliberate pans. A failed pass is also easier to remove and retry. Apple's stabilization documentation gives the same general editing advice: isolate the problem section before you apply correction.
Fix Crop, Warping, Wobble and Softness
- The subject is cropped: compare Minimum cut, shorten the section or choose a canvas with more room around the subject.
- Buildings or faces bend: try a lighter level and split around the strongest parallax or foreground movement.
- The picture pulses or looks gelatinous: compare the original for rolling-shutter wobble. CapCut's current public stabilizer route doesn't document a dedicated rolling-shutter switch.
- The video stays blurry: check the source frame. Stabilization can steady the camera path, but it can't reconstruct detail already smeared by motion.
- An intentional pan fights the frame: exclude the pan or isolate only the jitter riding on top of it.
- The preview stutters: judge a short local export before lowering quality or changing the stabilization level.
Judge by real picture detail, not the level name. Straight architecture, a horizon, a face near the boundary and objects passing close to the camera each reveal different failure modes. A single preview frame can't show the pulse that appears between it and the next one.
Fix CapCut Stuck on Stabilizing
For an export stuck on Stabilizing, CapCut's help page recommends limiting stabilization to the clips that need it, splitting long clips, simplifying the timeline, checking resources and retrying. The page also advises removing compound clips while you troubleshoot, since they may interfere with processing.
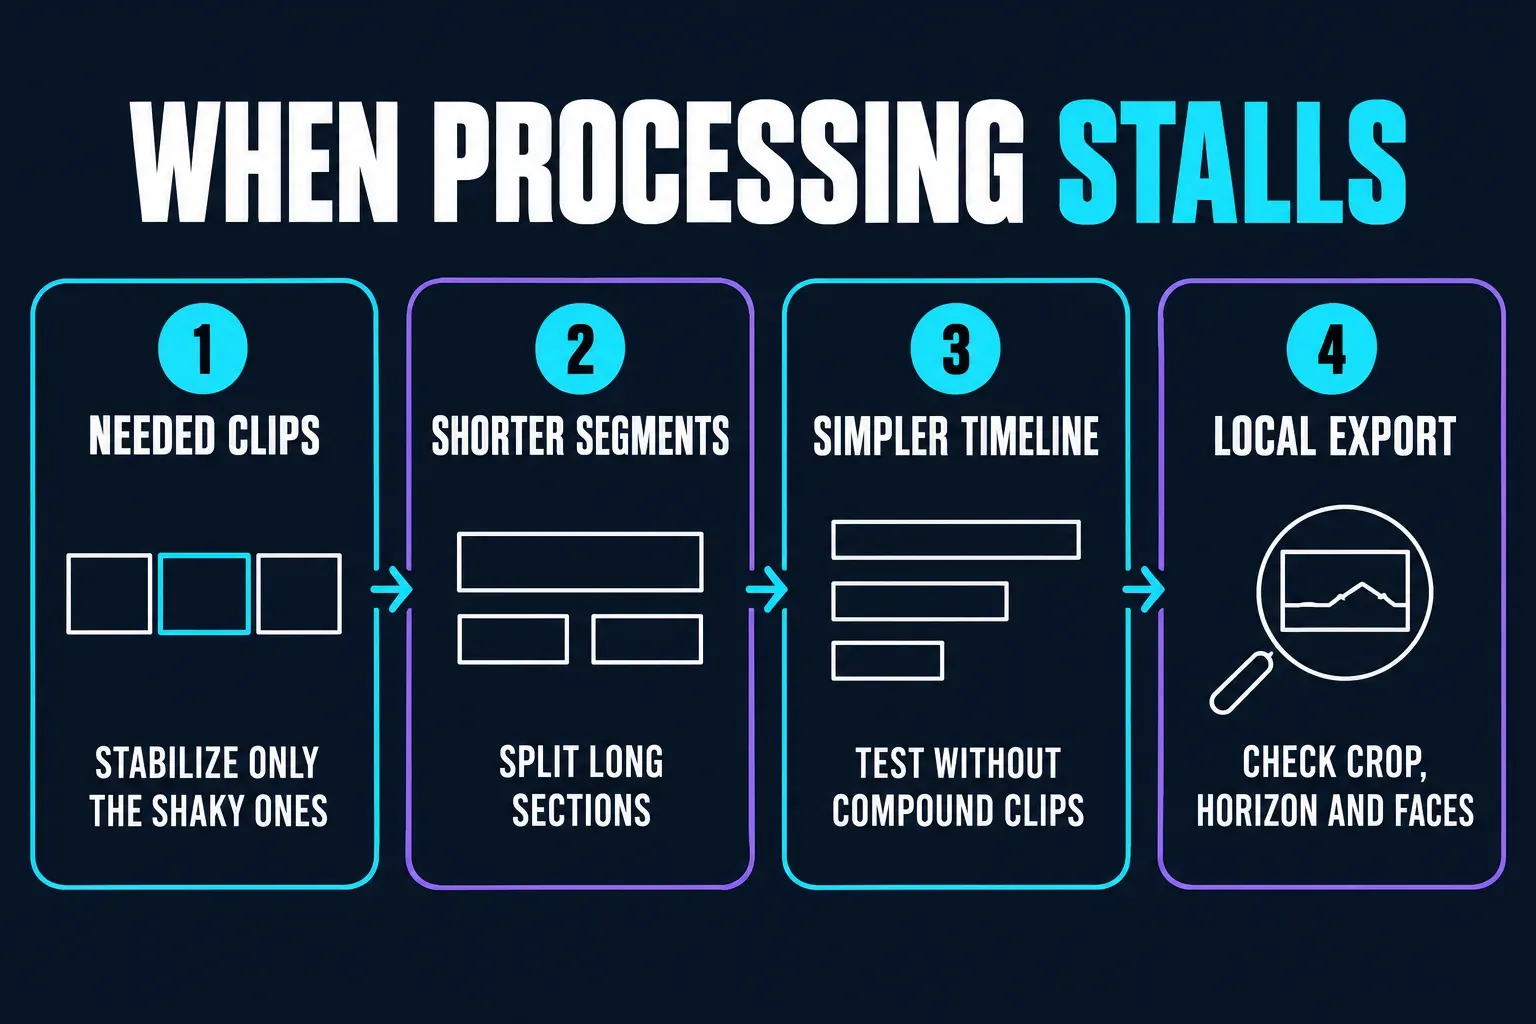
- Check every clip and disable Stabilize where the footage is already steady.
- Split a long stabilized section into smaller problem segments.
- Test the same source in a simple project without compound clips.
- Close unnecessary work, confirm free storage and restart CapCut.
- Retry a short local clip before changing the original source or whole project.
If one source file fails while another goes through, play the failing file outside CapCut and test a short section of it. Keep the original safe before you make an intermediate copy. If the stabilization pass finishes but the export fails somewhere else, switch to the narrower CapCut export-stuck checks.
Check Free vs Pro Access in the Live Editor
Stabilization access can vary by platform, build, plan, account and region. A control that shows no badge in one editor may be gated during analysis or export somewhere else. A community post can warn you that gating exists, but it can't define a stable price table for every current account.
Before you commit a deadline to this workflow, process a representative sample and open the current export route. You'll see the live badge, the upgrade prompt and the deliverable resolution for the account in front of you. The CapCut Free vs Pro guide explains the broader live-account check.
Export and Compare the Final Result
- Export the same difficult passage with Stabilize off, Recommended and one serious alternative.
- View all versions outside CapCut at normal speed.
- Check frame edges, horizon, faces, straight architecture and foreground crossings.
- Inspect split points for a crop or scale jump.
- Step through the worst movement frame by frame and look for local bending or pulses.
- Keep the version where the reduction in shake is worth the framing and distortion cost.
Match the export to the source and the delivery target instead of upscaling out of habit. Our CapCut export settings walkthrough covers resolution, frame rate, bitrate, format and codec, and keeps them separate from the stabilization-level decision.
CapCut Video Stabilization FAQ
How do I stabilize a video in CapCut?
Select the timeline clip, open Video, Basic, Stabilize on Desktop or Web, or Edit, Stabilize on Mobile. Use Recommended as the first comparison, wait for analysis to finish, then preview the full problem section and compare Minimum cut or Most stable when the crop or remaining shake needs a different tradeoff.
Which CapCut stabilization level should I use?
Recommended is a useful first comparison. Try Minimum cut when keeping more of the original frame matters, or Most stable when shake still distracts and the composition has room for stronger correction. Choose by comparing motion, crop and local warping in the same section.
Does CapCut stabilization crop the video?
Stabilization can crop or scale the picture to hide borders created while frames are repositioned. Minimum cut is intended to preserve more of the frame, while stronger correction may use a tighter composition. The exact crop depends on the source movement, so inspect every important edge.
Can I stabilize only part of a clip in CapCut?
Yes. Split before and after the unwanted shake, then apply Stabilize to the isolated segment. This protects intentional pans and steady sections, shortens analysis and makes crop or warping easier to compare. Check the split points for a visible scale jump.
Why is CapCut stuck on Stabilizing?
Current CapCut help recommends checking which clips use stabilization, shortening long sections, simplifying the timeline, testing without compound clips, checking available resources and retrying. Preserve the original and test one short local clip before changing the whole project.
Why does stabilized video look warped or wobbly?
Strong parallax, moving foreground objects, fast pans, rolling-shutter distortion or aggressive correction can bend straight lines or make the picture pulse. Compare a lighter level, isolate the difficult movement and inspect a local export. Rolling shutter may need a dedicated repair tool.
Is CapCut video stabilization free?
Access can vary by platform, build, plan, account and region. A control visible without a badge in one editor may be gated at analysis or export elsewhere. Process a short sample and open the current export route before relying on free access for a deadline.
How long does CapCut take to stabilize a video?
There's no reliable universal time. Clip length, resolution, frame rate, codec, motion complexity, level, device resources, free storage and Web upload or server conditions can all affect processing. A representative sample from the same source gives a better estimate than a fixed minutes-per-clip claim.